So installierst du Matrix Synapse Chat unter Ubuntu 22.04
Matrix ist eine kostenlose, quelloffene und webbasierte Lösung, die für Messaging- und VoIP-Dienste verwendet wird. Es handelt sich um ein offenes Standard-VoIP-Protokoll, mit dem du über Voice-over-IP und Chat mit anderen Nutzern bei einem anderen Dienstanbieter kommunizieren kannst. Es bietet RESTful HTTP JSON APIs für den Aufbau von verteilten und föderierten Chat-Servern ohne einen einzigen Kontroll- und Fehlerpunkt und stellt alle Referenzen für die APIs bereit. Es ist in Python geschrieben und ermöglicht es dir, deinen eigenen Server zu erstellen und alle persönlichen Daten und Chatverläufe der Nutzer zu speichern.
In diesem Beitrag zeigen wir dir, wie du Matrix Synapse auf Ubuntu 22.04 installierst.
Voraussetzungen
- Ein Server, auf dem Ubuntu 22.04 läuft.
- Ein gültiger Domainname, der auf die IP deines Servers zeigt.
- Ein Root-Passwort ist auf dem Server eingerichtet.
Erste Schritte
Zuerst musst du deine Systempakete auf die aktuelle Version aktualisieren. Das kannst du mit dem folgenden Befehl tun:
apt update -y
Sobald alle Paketindizes aktualisiert sind, installierst du die anderen erforderlichen Abhängigkeiten mit dem folgenden Befehl:
apt install curl wget gnupg2 apt-transport-https -y
Sobald alle Abhängigkeiten installiert sind, kannst du mit dem nächsten Schritt fortfahren.
Matrix Synapse auf Ubuntu 22.04 installieren
Standardmäßig ist das Matrix Synapse-Paket nicht im Standard-Repository von Ubuntu 22.04 enthalten. Daher musst du das offizielle Matrix Synapse Repository zu APT hinzufügen.
Lade zunächst den Matrix Synapse GPG-Schlüssel herunter und füge ihn mit dem folgenden Befehl hinzu:
wget -qO /usr/share/keyrings/matrix-org-archive-keyring.gpg https://packages.matrix.org/debian/matrix-org-archive-keyring.gpg
Als Nächstes fügst du das Matrix Synapse Repository mit folgendem Befehl zu APT hinzu:
echo "deb [signed-by=/usr/share/keyrings/matrix-org-archive-keyring.gpg] https://packages.matrix.org/debian/ $(lsb_release -cs) main" | tee /etc/apt/sources.list.d/matrix-org.list
Als Nächstes aktualisierst du das Repository und installierst das Matrix Synapse Paket mit dem folgenden Befehl:
apt-get update -y
apt-get install matrix-synapse-py3 -y
Während der Installation wirst du aufgefordert, deinen Domänennamen zu definieren (siehe unten):

Gib deinen Domänennamen ein und drücke die Eingabetaste. Du wirst gefragt, ob du anonyme Statistiken melden möchtest:

Wähle Ja und drücke die Eingabetaste, um fortzufahren.
Sobald die Installation abgeschlossen ist, starte den Matrix-Dienst und aktiviere ihn mit dem unten stehenden Befehl, damit er beim Neustart des Systems gestartet wird:
systemctl start matrix-synapse
systemctl enable matrix-synapse
Du kannst den Status der Matrix Synapse auch mit dem folgenden Befehl überprüfen:
systemctl status matrix-synapse
Du erhältst die folgende Ausgabe:
? matrix-synapse.service - Synapse Matrix homeserver
     Loaded: loaded (/lib/systemd/system/matrix-synapse.service; enabled; vendor preset: enabled)
     Active: active (running) since Sat 2022-06-04 08:01:22 UTC; 3s ago
    Process: 1916 ExecStartPre=/opt/venvs/matrix-synapse/bin/python -m synapse.app.homeserver --config-path=/etc/matrix-synapse/homeserver.ya>
   Main PID: 1923 (python)
      Tasks: 8 (limit: 9460)
     Memory: 78.6M
        CPU: 4.911s
     CGroup: /system.slice/matrix-synapse.service
             ??1923 /opt/venvs/matrix-synapse/bin/python -m synapse.app.homeserver --config-path=/etc/matrix-synapse/homeserver.yaml --config>

Jun 04 08:01:17 ubuntu2204 systemd[1]: Starting Synapse Matrix homeserver...
Jun 04 08:01:22 ubuntu2204 matrix-synapse[1923]: This server is configured to use 'matrix.org' as its trusted key server via the
Jun 04 08:01:22 ubuntu2204 matrix-synapse[1923]: 'trusted_key_servers' config option. 'matrix.org' is a good choice for a key
Jun 04 08:01:22 ubuntu2204 matrix-synapse[1923]: server since it is long-lived, stable and trusted. However, some admins may
Jun 04 08:01:22 ubuntu2204 matrix-synapse[1923]: wish to use another server for this purpose.
Jun 04 08:01:22 ubuntu2204 matrix-synapse[1923]: To suppress this warning and continue using 'matrix.org', admins should set
Jun 04 08:01:22 ubuntu2204 matrix-synapse[1923]: 'suppress_key_server_warning' to 'true' in homeserver.yaml.
Jun 04 08:01:22 ubuntu2204 matrix-synapse[1923]: --------------------------------------------------------------------------------
Jun 04 08:01:22 ubuntu2204 matrix-synapse[1923]: Config is missing macaroon_secret_key
Zu diesem Zeitpunkt ist der Matrix Synapse-Dienst gestartet und lauscht auf Port 8008. Du kannst ihn mit dem folgenden Befehl überprüfen:
ss -antpl | grep python
Du erhältst die folgende Ausgabe:
LISTEN 0      50         127.0.0.1:8008      0.0.0.0:*    users:(("python",pid=1950,fd=12))
LISTEN 0      50             [::1]:8008         [::]:*    users:(("python",pid=1950,fd=11))
Matrix Synapse konfigurieren
Nachdem du Matrix Synapse installiert hast, musst du es konfigurieren. Erstelle zunächst mit folgendem Befehl ein Sekretariat:
cat /dev/urandom | tr -dc 'a-zA-Z0-9' | fold -w 32 | head -n 1
Du erhältst die folgende Ausgabe:
R3jvgiDYyhh5XgduDPsgtwxPDiar8q2s
Als Nächstes bearbeitest du die Standardkonfigurationsdatei von Matrix Synapse:
nano /etc/matrix-synapse/homeserver.yaml
Lege deine Bind-Adressen fest, deaktiviere die Registrierung und definiere deine Secrets wie unten gezeigt:
    bind_addresses: ['127.0.0.1']
    enable_registration: false
    registration_shared_secret: "R3jvgiDYyhh5XgduDPsgtwxPDiar8q2s"
Speichere und schließe die Datei und starte den Matrix Synapse-Dienst neu, um die Änderungen zu übernehmen:
systemctl restart matrix-synapse
Konfigurieren von Nginx als Reverse Proxy für Matrix Synapse
Es ist eine gute Idee, Nginx als Reverse Proxy für Matix Synapse zu konfigurieren. Installiere zunächst das Nginx-Webserverpaket mit dem folgenden Befehl:
apt-get install nginx -y
Sobald Nginx installiert ist, erstellst du eine Konfigurationsdatei für den virtuellen Nginx-Host:
nano /etc/nginx/conf.d/matrix.conf
Füge die folgende Konfiguration hinzu:
server {
listen 80;
server_name matrix.linuxbuz.com;
location / {
proxy_pass http://localhost:8008;
proxy_set_header X-Forwarded-For $remote_addr;
}
}
Speichere und schließe die Datei und überprüfe die Nginx-Konfiguration mit dem folgenden Befehl:
nginx -t
Du erhältst die folgende Ausgabe:
nginx: the configuration file /etc/nginx/nginx.conf syntax is ok
nginx: configuration file /etc/nginx/nginx.conf test is successful
Starte anschließend den Nginx-Dienst neu, um die Änderungen zu übernehmen:
systemctl restart nginx
Du kannst den Status des Nginx-Dienstes auch mit dem folgenden Befehl überprüfen:
systemctl status nginx
Du solltest die folgende Ausgabe sehen:
? nginx.service - A high performance web server and a reverse proxy server
     Loaded: loaded (/lib/systemd/system/nginx.service; enabled; vendor preset: enabled)
     Active: active (running) since Sat 2022-06-04 08:06:22 UTC; 26s ago
       Docs: man:nginx(8)
    Process: 2433 ExecStartPre=/usr/sbin/nginx -t -q -g daemon on; master_process on; (code=exited, status=0/SUCCESS)
    Process: 2434 ExecStart=/usr/sbin/nginx -g daemon on; master_process on; (code=exited, status=0/SUCCESS)
   Main PID: 2436 (nginx)
      Tasks: 5 (limit: 9460)
     Memory: 4.8M
        CPU: 58ms
     CGroup: /system.slice/nginx.service
             ??2436 "nginx: master process /usr/sbin/nginx -g daemon on; master_process on;"
             ??2437 "nginx: worker process" "" "" "" "" "" "" "" "" "" "" "" "" "" "" "" "" "" "" "" "" "" "" "" "" "" "" ""
             ??2438 "nginx: worker process" "" "" "" "" "" "" "" "" "" "" "" "" "" "" "" "" "" "" "" "" "" "" "" "" "" "" ""
             ??2439 "nginx: worker process" "" "" "" "" "" "" "" "" "" "" "" "" "" "" "" "" "" "" "" "" "" "" "" "" "" "" ""
             ??2440 "nginx: worker process" "" "" "" "" "" "" "" "" "" "" "" "" "" "" "" "" "" "" "" "" "" "" "" "" "" "" ""

Jun 04 08:06:22 ubuntu2204 systemd[1]: Starting A high performance web server and a reverse proxy server...
Jun 04 08:06:22 ubuntu2204 systemd[1]: Started A high performance web server and a reverse proxy server.
Ein Superuser-Konto erstellen
Als Nächstes musst du ein Admin-Benutzerkonto erstellen und ein Passwort für den Zugriff auf die Matrix Synapse festlegen.
register_new_matrix_user -c /etc/matrix-synapse/homeserver.yaml http://localhost:8008
Gib dein Admin-Benutzerkonto an und setze ein Passwort wie unten gezeigt:
New user localpart [root]: matrixadmin
Password:
Confirm password:
Make admin [no]: yes
Sending registration request...
Success!
Matrix Synapse mit Let’s Encrypt sichern
Es wird auch empfohlen, die Matrix Synapse mit Let’s Encrypt SSL zu sichern. Installiere zunächst das Certbot Client-Paket mit dem folgenden Befehl:
apt-get install certbot python3-certbot-nginx -y
Sobald das Certbot-Paket installiert ist, führe den folgenden Befehl aus, um Let’s Encrypt SSL zu installieren:
certbot
Du wirst aufgefordert, deine E-Mail-Adresse anzugeben und den Nutzungsbedingungen zuzustimmen:
Saving debug log to /var/log/letsencrypt/letsencrypt.log
Enter email address (used for urgent renewal and security notices)
 (Enter 'c' to cancel): hitjethva@gmail.com

- - - - - - - - - - - - - - - - - - - - - - - - - - - - - - - - - - - - - - - -
Please read the Terms of Service at
https://letsencrypt.org/documents/LE-SA-v1.2-November-15-2017.pdf. You must
agree in order to register with the ACME server. Do you agree?
- - - - - - - - - - - - - - - - - - - - - - - - - - - - - - - - - - - - - - - -
(Y)es/(N)o: Y

- - - - - - - - - - - - - - - - - - - - - - - - - - - - - - - - - - - - - - - -
Would you be willing, once your first certificate is successfully issued, to
share your email address with the Electronic Frontier Foundation, a founding
partner of the Let's Encrypt project and the non-profit organization that
develops Certbot? We'd like to send you email about our work encrypting the web,
EFF news, campaigns, and ways to support digital freedom.
- - - - - - - - - - - - - - - - - - - - - - - - - - - - - - - - - - - - - - - -
(Y)es/(N)o: Y
Account registered.
Du wirst aufgefordert, die Website auszuwählen, auf der du das SSL installieren möchtest:
Which names would you like to activate HTTPS for?
- - - - - - - - - - - - - - - - - - - - - - - - - - - - - - - - - - - - - - - -
1: matrix.linuxbuz.com
- - - - - - - - - - - - - - - - - - - - - - - - - - - - - - - - - - - - - - - -
Select the appropriate numbers separated by commas and/or spaces, or leave input
blank to select all options shown (Enter 'c' to cancel): 1
Gib 1 ein und drücke die Eingabetaste, um Let’s Encrypt SSL auf deiner Website zu installieren.
Requesting a certificate for matrix.linuxbuz.com

Successfully received certificate.
Certificate is saved at: /etc/letsencrypt/live/matrix.linuxbuz.com/fullchain.pem
Key is saved at:         /etc/letsencrypt/live/matrix.linuxbuz.com/privkey.pem
This certificate expires on 2022-09-02.
These files will be updated when the certificate renews.
Certbot has set up a scheduled task to automatically renew this certificate in the background.

Deploying certificate
Successfully deployed certificate for matrix.linuxbuz.com to /etc/nginx/conf.d/matrix.conf
Congratulations! You have successfully enabled HTTPS on https://matrix.linuxbuz.com
We were unable to subscribe you the EFF mailing list because your e-mail address appears to be invalid. You can try again later by visiting https://act.eff.org.

- - - - - - - - - - - - - - - - - - - - - - - - - - - - - - - - - - - - - - - -
If you like Certbot, please consider supporting our work by:
 * Donating to ISRG / Let's Encrypt:   https://letsencrypt.org/donate
 * Donating to EFF:                    https://eff.org/donate-le
- - - - - - - - - - - - - - - - - - - - - - - - - - - - - - - - - - - - - - - -
Zugriff auf Matrix Synapse
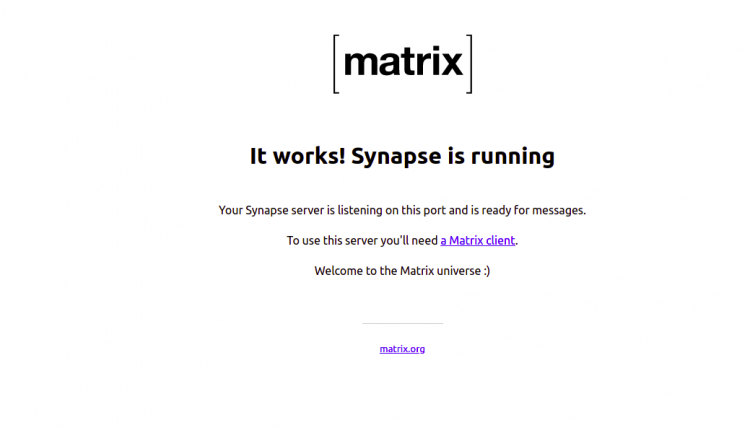
Du kannst nun die Installation von Matrix Synapse mit der URL https://matrix.linuxbuz.com in deinem Webbrowser überprüfen. Du solltest den folgenden Bildschirm sehen:

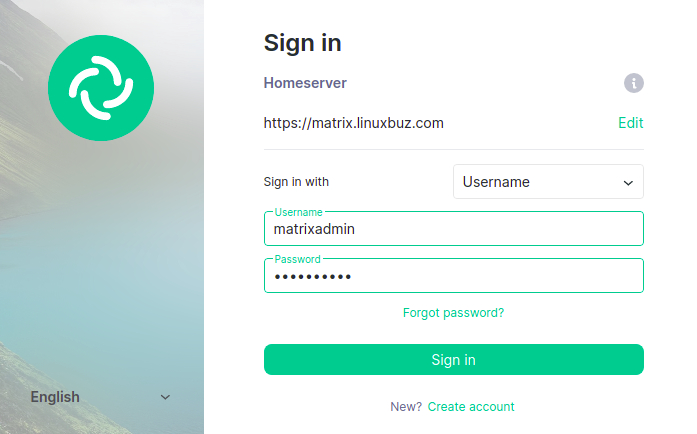
Du kannst deine Matrix Synapse auch mit dem webbasierten Riot-Client https://riot.im/app/#/login überprüfen . Du solltest den folgenden Bildschirm sehen:

Klicke auf die Schaltfläche Bearbeiten. Du solltest den folgenden Bildschirm sehen:

Gib die URL deines Matrix-Servers ein und klicke auf die Schaltfläche “ Weiter“. Du solltest die Matrix-Anmeldeseite sehen:

Gib deinen Admin-Benutzernamen und dein Passwort ein und klicke auf die Schaltfläche „ Anmelden „. Sobald du mit dem Matrix-Synapse-Server verbunden bist. Du solltest den folgenden Bildschirm sehen:

Fazit
In diesem Beitrag hast du gelernt, wie du Matrix Synapse mit Nginx als Reverse Proxy auf einem Ubuntu 22.04 Server installierst. Außerdem hast du Matrix Synapse mit dem webbasierten Riot-Client verifiziert. Jetzt kannst du deinen eigenen VOIP-Server mit der Matrix Synapse aufbauen.